


Chicken hatchery business is more than the ordinary raising of chicken. It basically entails the regular production and supply of day old chicks by artificial incubation.
There can be variations in the nature of the hatcheries such that it may be part of a breeding farm, an arrangement where day old chicks and parent stocks are produced or where the breeding stock is not maintained but eggs are purchased to produce day old chicks.
A vibrant parent stork that supplies the eggs for hatching has to be maintained if eggs are not going to be purchased. Young chicks that are not going to be sold must be considered as well as adult chicken that go broody. Other poultry species such as ducks, turkeys, guinea fowl, quails and pigeons can also be integrated into the hatchery.
Planning the hatchery
Licence
You will need a licence to operate a hatchery. This licence can be obtained from the Veterinary Department. It is issued after the department is satisfied that the premises meet all phytosanitary requirements and do not expose humans and the environment to pollution and health hazards. Although this project does not fall within the control of the National Environmental Management Authority (NEMA) it will be important to have a good environmental management plan to ensure that the waste produced from the hatcheries does not affect the local population.
Scale of operation
The turnover rate should be the basic concern because it determines the finances required to set up and run the business. The size of the perceived poultry market, whether local, external or a combination is a good indicator on the size of the hatchery to be set up. For the local market you need to investigate the following in order to determine the demand and therefore the appropriate size of the hatchery:
- The local chicken or poultry population
- The number of chicken or poultry farms within the locality
- Chicken or poultry varieties
- Number of chicks produced per month
- Required number of eggs to produce the chicks
- The number of batches and number of eggs hatching each batch
- The size of incubators and hatching house area
Site selection
You need to look for the following when selecting a site for the hatchery:
- A ground that is well drained and preferably a high ground
- Good infrastructure such as roads for transportation, electricity and water system
- Peaceful and clean environment with plenty of fresh air. Polluting environments such as heavy traffic, slaughter houses, poultry keeping farms, mining areas, chemical plants can affect the embryo. Check that the prevailing winds do not carry poultry debris from other farms into the hatchery.
- The building should be located at least 150m away from the nearest poultry house and should have its own entrance and exit separate from the parent stock house.
Housing
The design and construction must take into account the sanitation, control of temperature, humidity and diseases. Use appropriate building materials to prevent leaks and draughts. The floor should be flat, smooth and easy to clean and the height from floor to ceiling should be about 3.4 to 3.8m. Because of the necessity for regular washing and disinfection the inside walls should be covered by hard non-absorbent finish and tiles are preferred.
In order to minimize the risk of disease transmission between eggs and chicks, arrange the personnel and egg flow such that there is minimum or no back tracking by staff. Separate the personnel who work in the hatchery from those working in the breeder farm.
The building should provide rooms for
- Holding eggs prior to setting
- Grading and traying of eggs
- Incubation and hatching machines
- Chick sexing
- Grading and holding prior to sales
- Additional rooms for cleaning of equipment, fumigation and washing of staff
A simple hatchery layout

Required equipment
- Incubators
- Egg setting equipment
- Egg transfer equipment
- Chick handling and washing equipment
- Climate control equipment
Heating
Where the heating system uses electricity it is important to install a standby generator in cases of power failure. Power failure causes failure of temperature and humidity system.
Breeding
Place a cock for every 10 hens in a separate building. Provide laying nests and other equipment necessary for production.
Health
Poultry operations pose high risks of disease transmissions which at times can become epidemics of high proportions. Health and sanitary precautions must therefore be strictly adhered to. You must design and implement an effective and comprehensive health and safety programs that comply with international standards. The following sanitary procedures are recommended:
- Ensure that eggs for hatching are free from diseases if they have to be purchased.
- Fumigate all purchased eggs immediately
- Wash and disinfect all setting and hatching trays, the incubator and hatcher rooms, and all rooms in the hatchery after every hatch.
- Dispose hatchery debris by burning in specially constructed facilities or burying deeply.
- Attendants and visitors must be clean and disinfected before proceeding into the hatchery.
Records
Other than for your own business, it is a requirement that the following records are properly kept.
- Name and address of flock owner of all eggs received
- Number of eggs and date received
- The number of all hatching eggs and date received
- The number of all baby chicks sold and flock origin,
- Date, name and address of purchaser
- Flock inspection and test results
Hatchery operations
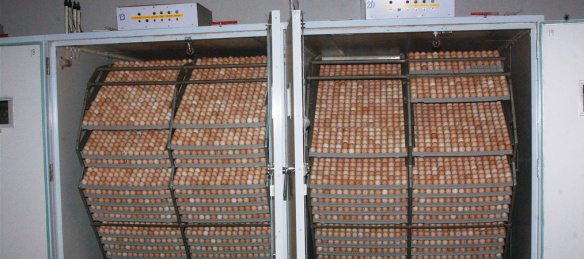
Incubation
- Store eggs in plastic egg trays at room temperature and 75% relative humidity.
- Do not store eggs for long before setting because they lose moisture through evaporation and therefore hatchability.
- Line egg cases with plastic to prevent evaporation if eggs must stay long before setting.
- Attach a record card to indicate the source of eggs, type and date of setting
- If the eggs are dirty they should be cleaned by washing in hot water with disinfectants such as Dettol. However washing increases the chances of infection and should be discouraged. Alternatively they should be fumigated prior to setting using formaldehyde.
- Warm the eggs to room temperature 6 hours before setting.
- Sort and grade the eggs before placing them in the incubator. Remove all broken, oversized, undersized or shapeless eggs.
- Place the eggs in clean trays and warm them to 37.5oC
- Warm the incubator to 36.5 – 37.5oC then carefully arrange the eggs in hatching trays. Set the eggs at an angle of 45o with the narrow end pointing down
- Maintain humidity at 70 – 80%
- Read the thermometer every 6 – 8 hours and adjust the heat accordingly whenever the thermometer reading falls below 36.5oC or rises above 37.5oC.
- Turn the eggs every 6 – 8 hours and continue doing this up to day 18.
- Check the temperature every time you turn the eggs and adjust the heat accordingly.
- Candle the eggs on day 7 and 14 to ensure you don’t have infertile or those eggs with dead embryos.
- Remove and dispose off all broken, infertile and spoilt eggs
- On day 19 transfer eggs from the incubator to the hatcher.
- Increase moisture to soften the eggs and help the chicks emerge.
- Chicks start to come out on day 20. Do not keep for long chicks that hatch early. Remove them from the hatcher and process them so that they can be delivered within 12 hours.
- Most of the chicks will have hatched on day 21.
- 20. Chicks dry within 30 – 45 minutes after they come out from their shells. Remove them immediately from the incubator after they are dry to prevent them from overheating.
- The day old chicks are now ready for sale or brooding
- Remove the egg shells, dead chicks and spoilt eggs from the hatching trays then clean and disinfect the incubator for the next batch of eggs.
Handling chicks
Packing
- Assemble the chick boxes before pulling the chicks from the hatchers.
- Pull out the trays one at a time
- Remove and count the healthy chicks as they are placed into the chick boxes.
- Leave the poor quality chicks in the trays and dispose them off with empty shells, unhatched eggs and hatchery debris.
- Allow the chicks to stand in the chick boxes for 4 – 5 hours to let them harden.
- Keep a record of total saleable chicks and hatches each day
Sexing
- Separate the cockerels and pullets at hatching time.
- Sexing can be done in three ways i.e. color, feather or vent sexing.
Vaccination
- Vaccinate against Marek’s Disease and New Castle Disease on day one.
Debeaking
- If the chicks are meant for broilers debeak them on day one.
- Debeaking can be done by cold method through a cold knife or scissors by the hot method through a debeaking machine with a hot blade.
Transportation
- Transfer chicks ready for delivery into chick holding rooms.
- Record the breed, fertility, hatchability, number of saleable chicks, percent hatch and culls before the chicks leave the hatchery.
- Give customers adequate information about breed, expected performance and vaccination record of chicks they purchase in a small written guide.
Article Source: https://biznakenya.com/what-you-need-to-know-before-starting-a-chicken-hatcheries-business/